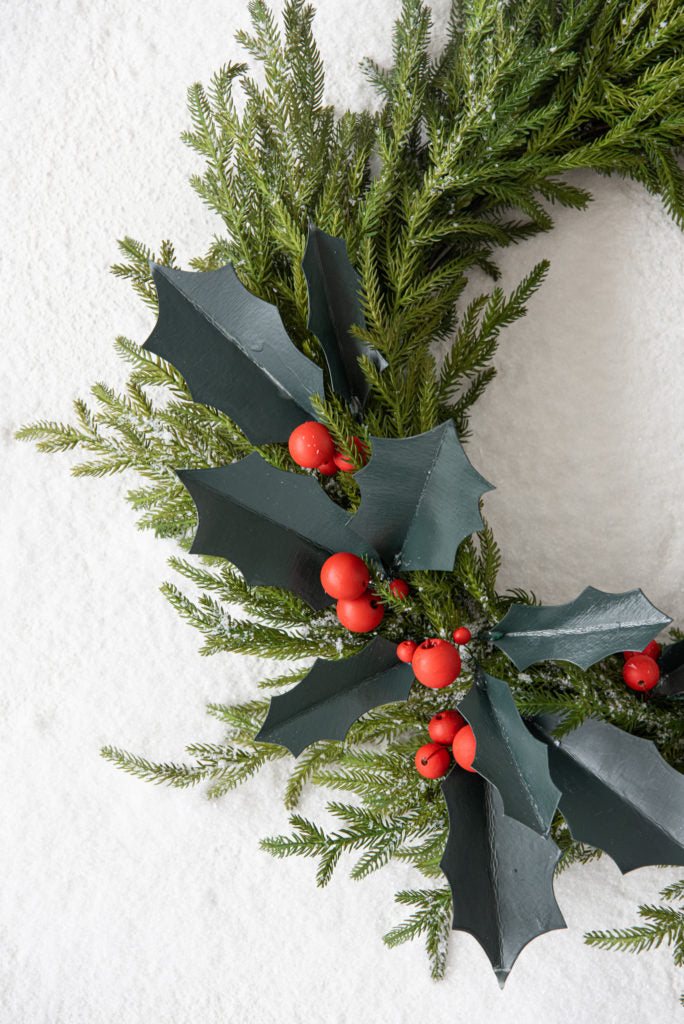
Whether inserted into a wreath, paired with a stocking or topped on a gift, a sprig (or two!) of holly adds that little something extra. This season at the market, our visual team created a few larger-than-life holly sprigs that we all loved so much, so we asked them to come up with a miniature version to share with you.
Here’s how the pinecones + holly sprigs came to life in the store:


Here's what we're showing you how to make today:
Here’s what you’ll need:

+ Sheet of chipboard
+ Holiday red paint — we used Hopscotch by Magnolia Home Paint
+ Small + large paintbrush
+ Foam brush
+ Green floral stem wire
+ Green floral tape
+ Wire cutters
+ Wood beads (1 inch + ¾ inch)
+ Holly Sprig Printable Template
+ Scissors
+ Pencil
+ Ruler
+ Natural Soy Pellet Wax (You can find a bag of this in the candle-making aisle at your local craft store.)
+ Disposable baking dish (we used an aluminum loaf pan) or non-food safe container (this is what you will melt your wax in)
+ Polycrylic Finish (Use if you choose to not use the wax method. See step 10.)
+ Hot glue gun and hot glue sticks
Note: To make one holly sprig, we used 2 large leaves and 3 berries. We suggest this combination for the small leaf size as well.
Step-by-Step Instructions
1. Paint an 8.5x11 sheet of chipboard with your green color. Set aside and let dry.
2. Cut 5-6 pieces of floral wire about 4-5 inches long.
3. Thread floral wire through the hole and around the bead, then twist to secure the loose wire together.
4. Holding the wire, paint the entire wood bead with your red color. Stick them upright in floral foam to dry.
5. Cut leaves out of the printable template. (Print out multiple copies if you want to make several sprigs!)
Click HERE to download and print holly sprig template.
Plug in your hot glue gun.
6. Making sure your painted piece of chipboard is completely dry, trace the cut-out leaves from the template on the chipboard, and cut them out.
7. Using a ruler, fold half of the leaf over the ruler to create a crease in the middle.
8. Cut 5-6 more pieces of floral wire about 4-5 inches long.
9. Grab a folded leaf and dab hot glue along the bottom of the folded line (about a half-inch of glue) and attach the floral wire stem. Press the leaf together and hold until secure and let dry.
10. Wax option (parental assistance needed) — Pour 4 cups of natural soy pellet wax into a non-food safe bowl or disposable container that is deep enough for dipping the entire leaf. To melt the wax, use a double boil method by placing the container over boiling water until completely melted. Holding the leaf by the wire stem, dip leaves individually in hot wax and let excess drip off. Carefully lay each leaf on wax paper and let completely dry and cool.
11. Line up the berry wires with the leaf wire and twist until tight. Trim to desired length and wrap with floral tape to bind together.
12. Attach your holly sprig to a wreath, stocking or gift!


Share your holly sprig with us by posting a picture and tagging us @magnolia!

